Introduction
When I hear the words “gaming mouse”, two thoughts come to mind. “Ooh, that’s interesting,” is followed swiftly by “wonder how much they’re gonna pillage my wallet for this.” Gaming mice have traditionally been expensive: companies like Razer, Logitech and even Microsoft have been engaging in a perpetual arms race to see who can cram more features into their latest offering. Sometimes, though, you don’t want 15 different sensitivity settings, and 42 buttons with 7 macros a piece bound to them. Sometimes, you just want a good, solid mouse with a great sensor, responsive buttons, and as little set-up fuss as possible. Razer has worked to answer that need, and the result of their efforts is the Salmosa, which I’ll be looking at today.
A Little About Razer
Razer has, in recent years, been putting out a broad range of computer accessories, all with a gaming focus. Their core expertise, though, is in computer mice. From their first breakout hit in 1999, the Boomslang, Razer has consistently raised the bar with their line of Gaming Grade mice. They were the first to introduce a 1600dpi optical mouse, the Diamondback, and the first to introduce a mouse with onboard profile memory, the Copperhead. The DeathAdder incorporated the first 3rd generation infrared sensor, which offered greatly increased tracking speed. Since then, Razer has branched out into keyboards, 5.1 headsets and soundcards, all with the aim of making products tailored to the needs of the serious gamer. Clearly, these people are not content to rest on their laurels. From Razer’s Website:
The Razer Salmosa is the quickest entry level gaming-grade mouse armed with the fastest tracking optical sensor in the world. Designed to be one of the lightest and most compact mice of its class, it is the ideal mouse of choice for finger-tip grip gamers who seek both speed and control.
The Salmosa is clearly trying to pack a lot into a small package. Utilizing the same 3G sensor as the DeathAdder, it eschews its bigger cousin’s lights and extra buttons, instead delivering the essentials in the smallest practical package. The Salmosa is designed for the fingertip grip style, which I’ll go into later. For now let’s take a closer look, and see if this is a mouse you can sink your teeth into, or one that just bites.
Packaging
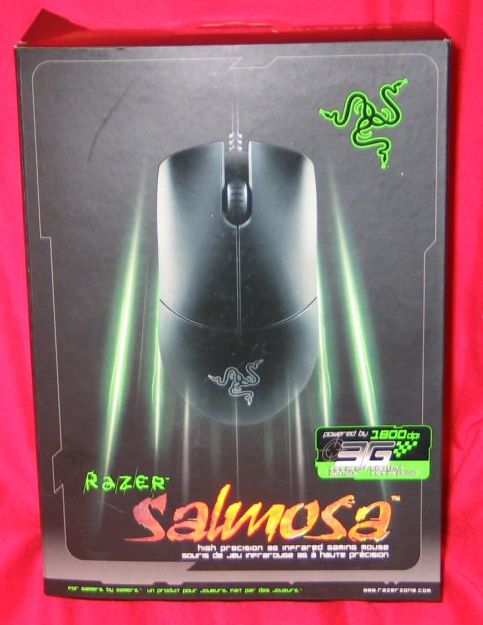
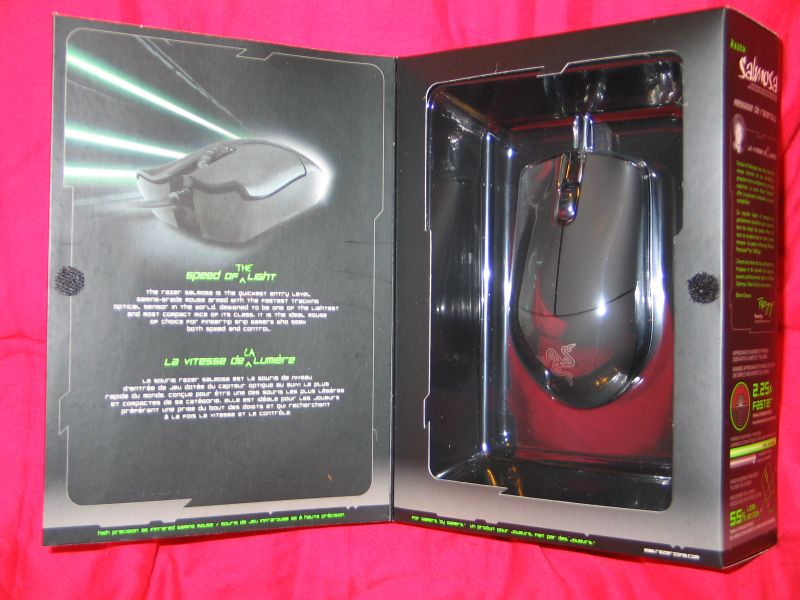
As usual, Razer has packaged the Salmosa in a way that is straightforward, and appealing to gamers. The front features the mouse itself front and center, with the Razer logo and product name also prominent. The back features a breakdown of product features, along with a few detail shots. The left and right sides feature a message from “RazerGuy” in english and french. Opening the front flap, we see the mouse itself encased in a plastic sarcophagus, so you can get a quick approximation of the feel without ripping the box open.
 |
 |
| Box front | Box back |
 |
 |
| Box left side | Box right side |
|
|
|
|
Box with front flap open |
|
A Closer Look
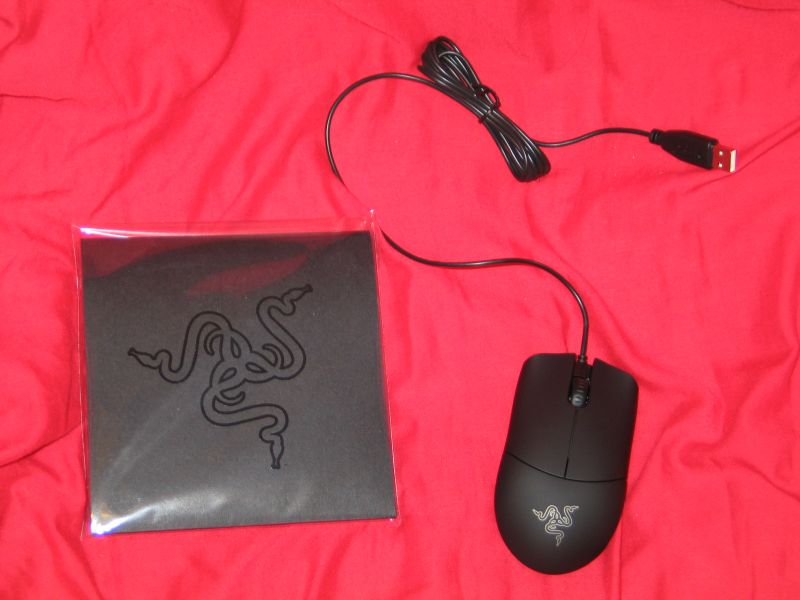
Once the packing materials are stripped away—a process that does not, thankfully, require scissors, box cutters, or high-powered lasers—we see the mouse itself, along with a black folder. Opening it up, the folder itself yields the driver download CD (more on that later), the manual, a certificate of authenticity, and a couple of stickers. There’s also a promotional card, though why Razer feels the need to advertise the product inside the product’s own packaging, I can’t say. Excess enthusiasm, maybe?
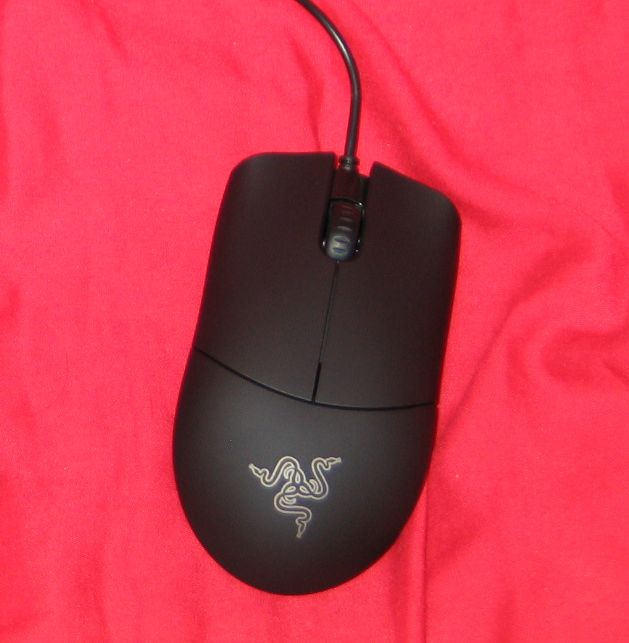
Looking at the mouse itself, the Salmosa is clearly designed from a minimalist standpoint. The top is covered in matte black rubber, which provides a grippy, easy to clean surface. The two main buttons are huge, taking up 2/3 of the mouse’s top surface. A bit of experimentation showed that they are clickable along their entire length, which indicates a remarkably well-balanced hinge mechanism. The mouse wheel is notchy and easy to scroll and click, though it could use more texturing on the wheel surface for grip. As has become standard with Razer mice, the plastic-covered cable is thin, flexible, and seven feet long. Over time the cable does have a tendency to kink up if you wrap it up too tightly, so a bit of care is warranted.
 |
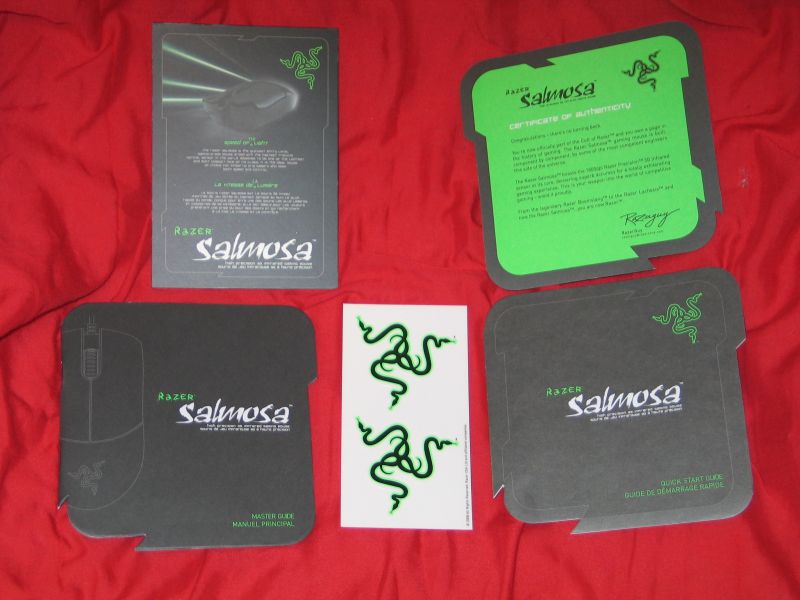 |
| Box contents | What’s inside that black folder |
 |
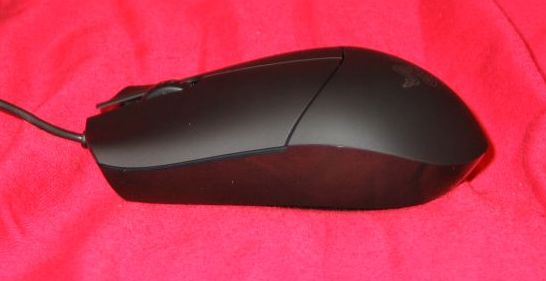 |
| Top view | Left side |
 |
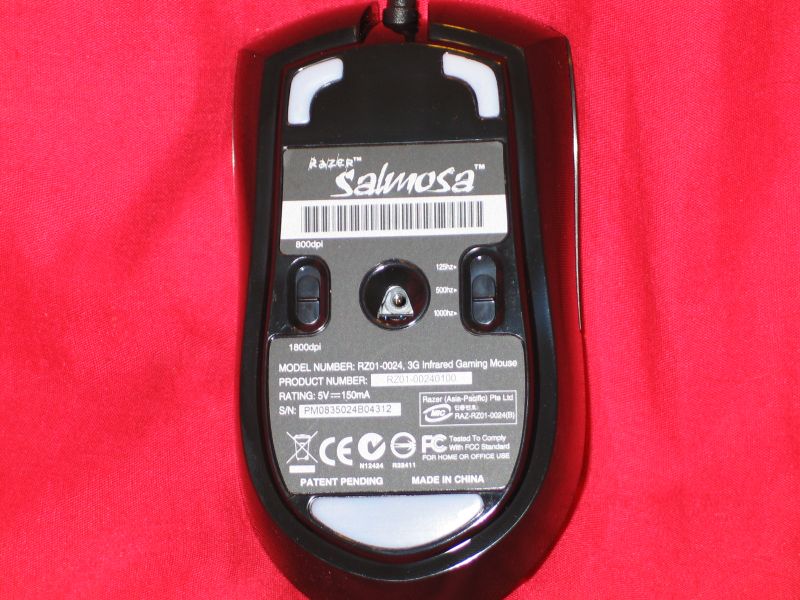 |
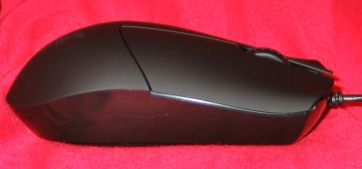
| Right side | Mouse bottom |
True to the minimal esthetic, there are no extra buttons on the Salmosa. While some may not lament the lack, I frequently found myself reaching for the back and forward buttons that are not there. The Salmosa is not without extra features, though. Flip it over, and you’ll see a couple of recessed slide switches. The one on the left controls the tracking resolution, swapping between 800dpi and 1800dpi. While the ability to change resolutions is nice, putting the switch on the bottom of the mouse makes it impractical to use while in-game. I found myself setting it to 1800 dpi and leaving it alone, which is what most people will probably end up doing. The right hand switch controls the USB polling rate, which determines how many times per second the mouse sends reports to the system. For best accuracy, this rate should be set to 1000hz when possible. This does impose an extra bit of CPU overhead, however, so people with older systems may need to set it lower, to 500hz, or even 125hz if the problems persist.
The other main noticeable feature about the bottom side is the PTFE feet. The pads themselves are surprisingly small, but carefully placed to avoid drag. In practice I have noticed no friction or slowdown issues at all—indeed, the ease with which this mouse will slide around took some getting used to, compared to the big heavy mice I have used in the past.
Grip
One issue that comes up with any mouse, gamer-oriented or not, is grip. Using a mouse means hanging on to it in a way that allows for movement and button pressing. After much research, Razer has classified three main styles of grip:
- Palm grip: the hand lies flat along the body of the mouse; button presses are accomplished by pushing down with the whole finger. Motion is done with the whole arm, with the elbow as the pivot. This grip favors large, contoured mice with a weighty base, to avoid excessive sliding.
- Claw grip: the mouse is gripped with the tips of the fingers and thumb, with the back end resting against the palm of the hand. Large movements are made from the elbow; fine movements originate with the wrist. This style favors flatter mice, with a raised hump at the back to rest against the heel of the palm.
- Fingertip grip: the mouse is gripped solely with the tips of the fingers. Large movements originate from the wrist, fine movements from the fingertips. This style favors smaller, flatter mice, or mid-sized mice for people with large hands. As a point of reference, the standard Dell courtesy mouse that comes with every budget PC is shaped for this grip.
The Salmosa was designed with the fingertip grip in mind, though people with small hands may find themselves using the claw grip instead. In practice, I found it hard to find a grip I was comfortable with. Given that I have large hands, and am accustomed to large mice like the Razer DeathAdder or the Logitech G9, this is perhaps unsurprising. Eventually, I found myself settling into a sort of hybrid grip: fingertip when fine-detailed movements were needed, claw grip otherwise.
Installation and Set-Up
Getting the Salmosa to work is about as simple as it gets: plug it in, wait for the OS to detect and initialize drivers, and away you go. Should you want a bit more control over your experience, the Salmosa comes with a CD that contains not custom drivers, but a driver downloader program that fetches the latest drivers from Razer’s support website.
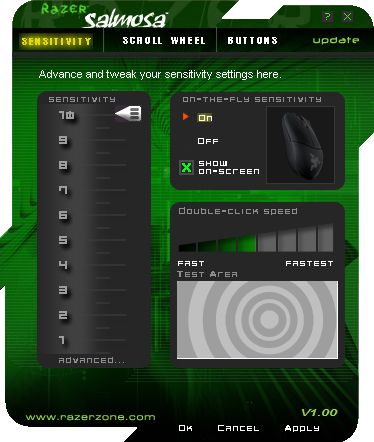
The driver software installs very quickly, and opening the Customizer first presents you with this window. The slider on the left controls overall pointer sensitivity, while the green horizontal meter on the right controls double-click speed. The bullseye on the lower right gives you a quick way to test your double-click settings, it will ‘shatter’ if you’ve clicked fast enough to count. The on-the-fly sensitivity box in the upper right lets you choose whether or not to allow for in-game changes to sensitivity. This is accomplished by holding a mouse button bound to the sensitivity function and rolling the scroll wheel. Given that the Salmosa has no extra buttons, this feature seems largely impractical, unless you’re willing to give up mouse3 to the task.
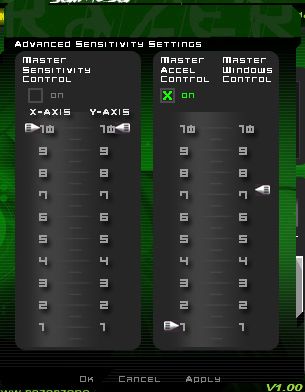
Clicking on the ‘advanced’ button beneath the pointer sensitivity slider brings you to this window, which gives you some more fine-grained control of things. Here you can set movement sensitivity separately for the x-axis (left-right movement) and y-axis (up-down movement) separately, if you are so inclined. Direct control of the pointer acceleration factor and Windows pointer speed can also be had here. The Windows pointer speed control seems to be here largely for convenience’s sake, but being able to set acceleration directly is essential for any gamer. With Windows’s default high acceleration factor, rapid aiming adjustments in FPS games can overshoot where you intended to go. For consistency’s sake, setting the acceleration to 0 will ensure that moving the mouse x distance will always result in y amount of pointer motion, regardless of how quickly you do it. Afterward, setting sensitivity becomes much easier.

The second tab along the top brings us to the scroll wheel settings. Here we can set how many lines to scroll with each notch in the wheel, as well as whether to try to enforce universal scrolling or not. Pretty basic stuff.
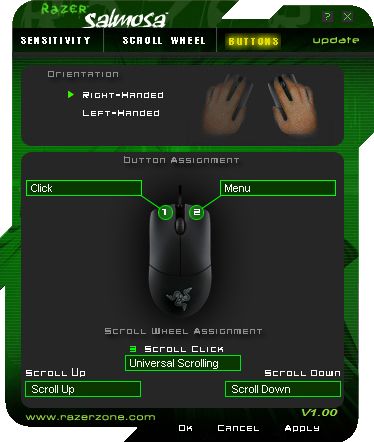
The third tab along the top brings us to what is usually a very important setting for gaming mice: button mappings. In the case of the Salmosa, however, few will want to do much beyond possibly swapping left and right mouse buttons for southpaw gaming. Binding mouse1 to anything but its default is a recipe for disaster, and remapping mouse2 is similarly unwise. Some may want to bind mouse3 to something else, but this is usually accomplished easily enough in-game.
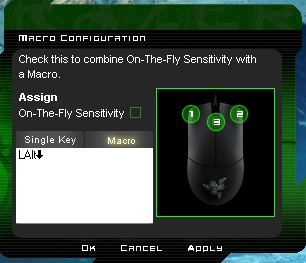
Should you desire to do so, Razer’s drivers allow you to bind single keyboard keys or macros to a mouse button. Two main problems make this somewhat frustrating. The first is that while the software will indeed pick up whatever keys you press—for the most part—it makes no attempt to ‘capture’ input while doing so. The upshot of this is that if the key sequence you pressed causes something to happen elsewhere, like Alt+Tab, it will not be captured correctly. The second problem is that the macro editor does not let you insert delays between keypresses, or even control the playback rate. Every key-press and release in your macro will always get replayed at top speed, which is not always desirable behavior.
Taking a Test Drive
To fully put the Salmosa through its paces, I used it for a week on a variety of tasks, from FPS games to web browsing. For the gaming tests, I loaded up Unreal Tournament, and set it to play several botmatches against low-difficulty bots. For this test I played UT3’s Greed mode, which equips everyone with instant-kill hitscan weapons. I used it on a variety of surfaces, from bare desktop to slick steel & teflon pad, to textured cloth pad. Here are my impressions on:
Accuracy: The 3G optical sensor is put to good use here. The pointer did not once skip or lag on any surface I tested. Pointer trembling, which can happen when the mouse is misreading a surface, never happened either. Low-sensitivity testing in several UT3 Greed botmatches gave satisfying results: consistently hitting point of aim was simple.
Stability: For this test, I cranked the resolution and sensitivity up to maximum, and then went into another Greed botmatch. Here the mouse’s light weight and slick PTFE feet worked against it; I was having constant overshoot problems. Switching to the high-traction cloth mat helped somewhat, but hitting a point of aim quickly and consistently remained problematic. This can be overcome with practice, but it is something to watch for.
Ergonomics: Here the Salmosa slips a bit. There are no ridges, bumps or indentations to grab onto with this mouse. If not for the grippy texture of the rubber coating, this mouse would be slipping out of my grip constantly. As it is, I still find myself having to pinch the body of the mouse hard between thumb and pinky finger to keep it under control during high-intensity matches. The oversize buttons have a clicky feel to them that is quite satisfying. I have noticed an occasional squeaky noise when I press them, though, accompanied by a bit of friction. This never persists for more than a half-dozen clicks, but it is distracting. The mouse wheel rolls smoothly between notches, and each notch has a solid click to it.
Fit and Finish: The Salmosa’s looks can best be described as subtle. There are no glowing LEDs, bright colors or outlandish shapes here, just a simple, no-nonsense black. The thin, long cord is covered in a hard rubber sheath that provided minimal friction, and no resistance during use.
Conclusion
“Budget Gaming Mouse” may sound like an oxymoron to some, but that’s exactly what Razer has delivered here. The Salmosa may lack the bells and whistles of its more expensive cousins, but it has all the essentials of a solid mouse. With an average price of $35 (Google Shopping results here), this mouse raises the bar for what we consider to be “entry-level mice”.


[…] Click the icon, or enter email address to receive reviews via email! We will not share your info! When I hear the words gaming mouse, two thoughts come to mind. Ooh, thats interesting, is followed …Read more… […]
[…] TechwareLabs gets its hands on the Razer Salmosa Gaming Mouse […]